One issue (among many!) that people are having with the transition from Picasa Web Albums to Google Photos is how to directly link to a photo from Google Photos.
2019-12-29 Update:
Since people are still using this page to figure out how to post Google Photos images to message boards, I thought I’d leave a more current update. The method below still works, and is still what we have to do in order to post a photo that’s in your Google Photos account to a message board. (Shout out to all the various message board peeps who end up here! I love finding that new message boards have linked here!)
Some of you rightly point out that Google Photo links expire, but, not if you create your link exactly this way. The images immediately below (in my 2017 update) were posted in 2017. If they’re still there, then this method still works! If I find a better way to streamline the process for you, I’ll update it. But until then, if you can see my images below, then you’ll know that links set up this way have not expired yet.
Let’s see what photo updates 2020 brings! Happy message board posting! Keep sharing pics of your cars, model trains, knitting projects and all of your other wonderful hobbies!
2017-04-21 Update:
Here are my updated (and simplified!) instructions for getting an image’s direct link in Google Photos. This works for using your Google Photos images in other places around the web: blogs, forum and message board posts as well as sharing a direct link with a friend.
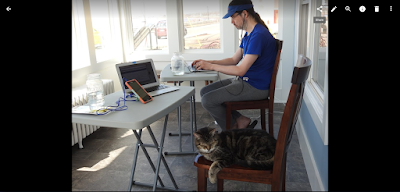
Step 1: Browse to the Photo’s page
On the Google Photos website, click on the photo you want to share, post or use. This will take you to the individual photo’s page, with a black background. But note, this does not give you a link to the photo itself.
Step 2: Share the Photo
Choose the 3-dot share icon in the upper right of the screen to “share” the photo.
From the options available, select “Get Link.” Note, this link is a permanent, public page on which your photo can be found, but it is still NOT the link to your photo.
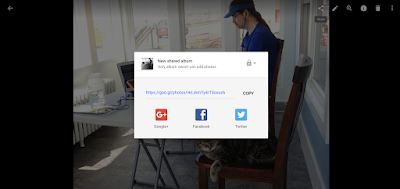
Step 3: Click the link to visit that Photo’s “shared album” page
This page will look like a photo album that only has one photo in it.

Step 4: Click on your photo in this “shared album” to view the individual Photo
We’ve done all this to basically get back to Step 1. (Thanks, Google!) The difference is that now you are viewing this single photo in a shared album instead of in your personal Google Photos stream. The page you are currently on has been designed to be public, whereas when you view your own Google Photos account, you are viewing private photos.
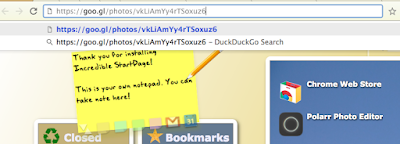
Step 5: Copy the Photo’s image link (not the page’s link)

Right click on the image itself, and select “Copy Image Address.” The direct link for that photo will be copied to your clipboard, and can now be pasted anywhere.
(Alternatively, you can select “Open image in a new tab” and the URL in the address bar of that tab will be the direct link to the photo.)
Step 6: Paste the image link
Paste that URL into an html tag, a message board or forum post as you would use any other image link.
Notes:
- The URL is long and ugly! If you need to share this link, or use the text for this link, consider shortening it or “hiding” it behind alternative display text with this long URL as the attached link.
- The URL (shown in an html tag as an example) is of the form:
<img src="https://lh3.googleusercontent.com/VERYlongstring=w363-h644-no"/>
- You can resize the image by changing the pixel values after “h” and/or “w” before the “-no” (Do not erase the “-no” by mistake!)
- If your forum or message board demands an image URL ending in .jpg, then you can add “?.jpg” after the “-no” and this very often works. Your URL will then be of the form:
<img src="https://lh3.googleusercontent.com/VERYlongstring=w363-h644-no?.jpg"/>
https://lh3.googleusercontent.com/VERYlongstring=w363-h644-no?.jpg
Of course, what we really need is a darn button or menu option for “click to embed/get direct link.” Perhaps this is coming, at which point we can all have a good laugh about how near impossible it was to use all these photos Google so carefully collected and made searchable.
But, until Google Photos changes how it works it yet again, happy sharing, direct-linking and embedding!
Original Post (2016-02-19) - note Google Photos URL structure has since changed, but I'm leaving this here for reference
If you have a photo in a Picasa Web Album that you’d like to put on a website, you can right click to “Open Image in New Tab.” Then, the URL of that new tab will be a link that ends in a .jpg extension, and can be used in an html IMG tag. But, with Google Photos, right clicking to open a photo in a new tab gives you a very long URL that does NOT end with the jpg extension.
This might make it seem that we can no longer directly use images from our Google Photos accounts in html websites. Fortunately, while image URLs typically do end in a standard extension like .jpg or .png, they don’t have to. The URL of the tab when you right click (or control-click) may not look like it’s going to provide you with an image on your html page, but happily, it does!
You can also define attributes, such as the width of the photo, like this:
<img style="width: 1000px;" src="https://lh3.googleusercontent.com/verylongstring-no"/>
In some cases, you may still need the .jpg extension. One such example is posting images to bulletin boards or forums who forbid the use of html tags for security, but allow you to post images using the [img] tag. Fortunately, you can simply add the .jpg extension to that long, Google link and the URL should still point to your image. (Note the “?” added immediately before the .jpg extension.)
<img style="width: 1000px;" src="https://lh3.googleusercontent.com/verylongstring-no?.jpg"/>
So, while this may have appeared to be one feature we would lose as Picasa Web Albums is phased out in favour of Google Photos, at least on my basic html website, I can still include my photos stored online in Google on my website’s pages.


Update:
Following my own advice, I made another blog post that contained images (screenshots of my laptop). I uploaded these images to Google Photos through my browser, then right/control-clicked to get the image URL and used these in my image html tags. As they say, “It worked on my machine . . .” but everyone else was seeing a blocked/forbidden image symbol.
My solution to this problem was to individually “share” each photo, and choose the “get link” option. Then, clicking on that shortened link sent me to the photo’s “public” page (as opposed to, I guess, the photo’s “private” page in my Google Photos account). I could then right/control-click to get the image address and finally use THAT url in my html image tag, and all was fine.
So, if you have trouble using a Google image in an html tag, first check to see whether a privacy setting is the issue. You might have to first make sure the image has been “shared” so that Google Photos creates a link for the photo that is viewable to the public. Then, that image link address can be used.